

CAVN ( 4 Sets 2 Sizes) DIY Bath Bomb Molds Set with Instructions DIY Metal Bath Bomb Molds Easy for Crafting Your Own Bath Bombs

Product Description
CAVN ( 4 Sets 2 Sizes) DIY Bath Bomb Molds Set with Instructions DIY Metal Bath Bomb Molds Easy for Crafting Your Own Bath Bombs
- You will get 2 Size 4 Sets 8 Pieces CAVN Metal Round Bath Bomb Mold, Easy to Make Your Own Perfect Bath Bombs.
- 100% New and Premium Materials-Sturdy Aluminum made, do not waste money to buy the plastic ones (break easily). Our Aluminum Metal Bath Bomb Mold is long lasting molds for your long-term repeat use.
- 2 Size Bath Bomb Mold Included-Large size diameter is 2.56 inch; Medium size diameter is 2.17 inch; You can choose to make different size Bath Bombs depending on the ingredients used.
- DIY Your Own Recipes-You can add in nourishing oatmeal, soothing essential oil or flower petals to make your own recipes.
- Easy to Use and Clean-You can read our Using Instruction to make your own bath bombs. The material of them is aluminum; using water to clean is okay.
Be Smart to Choose the Aluminum Material Bath Bomb Mold Rather than Plastic Material Bath Bomb Mold :
Aluminum Bath Bomb Molds are sturdy and it can be repeated using in long-term, while the Plastic Material is easily broken and deformation during your using.
Specifications of CAVN Bath Bomb Mold:
Material: Aluminum
Size: Large---2.56*1.2 Inch; Medium---2.17*1 Inch
Package Including: 4 Sets 8 pieces and 2 Sizes. ( 2 sets Large size; 2 sets Medium size )
Steps to Make Your Own Bath Bomb:
Step 1----Prepare Your Supplies together.
Dry Ingredients and Liquid Ingredients
Tools: Bath bomb molds; Whisk; Spoon; Bowl; Cup.
Step 2---Mix dry ingredients.
Note: Stir them all evenly with whisk.
Step 3---Mix the liquid ingredients
Note: Be Careful that too much water will ruin your bath bomb!
Step 4---Mix liquid and dry ingredients together.
Note: The final mixture should begin to clump together when you squish it.
Step 5---Pack the final mixture into Bath Bomb Molds.
Step 6---Press the two half molds sides together.
In this step, you can add some rose petals or lavenders on top of the second half.
Step 7----Compact the mixture into mold.
Press firmly to prevent bath bomb cracking;
Remove the excess mixture around the mold.
Note: Be careful in this step, rotate the mold will not help to remove the excess bath bomb.
Step 8---Using a spoon to Tap slightly around the mold.
Step 9---Gently remove the bath bomb mold from the forming bath bomb.
Step 10---Make the forming bath bomb dry.
Place the just forming bath bomb on wax paper, a fluffy towel is under the wax paper.
Let the bath bombs dry for at least one day before you use them.
Technical Specifications
You might also like
Citric Acid - 1 Pound - Non-GMO Project Verified, Organic, 100% Pure - Great for Bath Bombs

Milliard Citric Acid - 5 Pound - 100% Pure Food Grade NON-GMO (5 Pound)

Spicy World Citric Acid, 5-Pound (Food Grade, NON-GMO)
Citric Acid, 1 Lb, 100% Pure Powdered Crystals, Bulk, Food-grade
Milliard Citric Acid - 2 Pound - 100% Pure Food Grade NON-GMO (2 Pound)
Epsoak Epsom Salt 2 lbs. USP Magnesium Sulfate

Liquid Dye Colorant Set for Soap, Bath Bomb Making - Red, Yellow, Blue, Lilac, Peach, Seafoam, Yellow, Turquoise and Lime, 0.30 Ounce Each Color
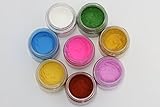
Cosmetic Grade Matte Colorant for DIY Mineral Makeup & Soap Makings
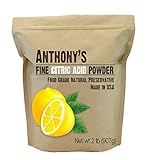
Anthony's Citric Acid Powder 2lb, Natural Food Preservative, Made in USA and Belgium

Ajent Citric Acid 2 Pound. 100% Pure Food Grade Non-GMO (Approved for Organic Foods) Bulk