

Tile Rescue Injection Repair Adhesive 10.5 oz. Tube for Loose & Hollow Tile, Marble, Stone & Wood Floors. *for Best Results Use The Proven Power of a Caulk Gun*
Product Description
Tile Rescue Injection Repair Adhesive 10.5 oz. Tube for Loose & Hollow Tile, Marble, Stone & Wood Floors. *for Best Results Use The Proven Power of a Caulk Gun*
- Extra strong formula: Tile Rescue adhesive is specially formulated to re-bond loose and hollow tiles, securing tiles back in place without the need for costly removal or replacement.
- For professional results it is highly recommended to use Red Devil 3935, 3936 or 3988 caulk guns. Do not use Skeleton Style or High Thrust caulk guns.
- Easy Application Process: Includes drilling injection holes, vacuuming debris, and applying adhesive through grout lines for secure bonding.
- Versatile Usage: Suitable for both small area repairs and entire floor restoration projects.
- Material Compatibility: Works effectively with existing grout and tile surfaces for seamless repair results.
- Low VOC Formula: Non-hazardous and non-flammable adhesive composition for safe indoor use. Made in the USA!
- Tile Rescue is not recommended for use on floating floors.
- Coverage Area: One 10.5 oz tube covers approximately 4 square feet of tile surface area.
TILE RESCUE Injection Repair Adhesive is a Professional Strength, Very Fluid, Adhesive designed to re-bond and permanently save those loose and hollow, crunchy sounding tiles without removal. Coverage: One 10.5 oz. TILE RESCUE Injection Repair Adhesive covers approx. 4 sq. ft. Directions for Rescuing and Repairing Loose & Hollow, Crunchy Tiles: 1.Using a masonry drill bit whichever is largest drill 3-5 injector holes through the grout line around each side of the tile. Do not drill into the subfloor. 2.Vacuum over each hole to clear, tapping with rubber hammer to help loosen debris. 3.Place TILE RESUCE tip into injector hole to measure for largest cut point so tip does not rest onto the subfloor. Cut the tip. 4.Using a standard caulk gun squeeze TILE RESCUE into each hole. Squeeze slowly and don't apply too much pressure. If one hole is blocked move on to inject the other holes. Sometimes you will see TILE RESCUE come up out of nearby holes and grout lines. This is good as it ensures complete coverage of the problem area. If no adhesive comes out of nearby holes it's ok, simply tap the tiles to check the hollow sound is now solid. 5.Wipe up excess TILE RESCUE with clean, wet sponge as necessary. Place weighted objects over Rescued tiles and allow to dry for a minimum of 12-24 hours, dries clear. 6.When dry re-grout over injected holes, will adhere to existing grout. After grout has dried wipe clean with damp sponge. Your floor has been Rescued by TILE RESCUE! Solid! GUARANTEED! 100% ECO-FRIENDLY, LOW VOC's, NON-HAZARDOUS, NON-FLAMMABLE Can be used on small areas or the entire floor!
Technical Specifications
You might also like
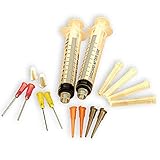
Precision Applicators - Dispense Pack by Rockler

Newborn 930-GTD Drip-Free Smooth Hex Rod Cradle Caulking Gun with Gator Trigger Comfort Grip, 1/10 Gallon Cartridge, 10:1 Thrust Ratio

Red Devil 0497 Tile Paste Adhesive Squeeze Tube, White

Stone Pro Traverfill - Travertine Hole and Void Repair - 1 Pound - Light

QEP 10061 Gum Rubber Grout Float
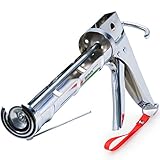
3 in 1 Caulking Gun (HEAVY DUTY CHROME PLATED) Fits Standard Size 10oz Caulk - Refillable 3 in 1 Design Includes Built in Cutter and Puncher Tool - Perfect for Industrial & Home Use!

Fix-A-Floor Extra Strength Bonding Adhesive for Loose and Hollow Tile Repair 10 fl oz / 300ml Tube by Fix-A-Floor

Reptile Premium Loose Tile Adhesive 10 oz