

YEQIN Universal Cap/Hat Hoop, Embroidery Machine Cap Hoop for Brother Babylock Singer Bernina Janome Singer Husqvarna Viking Pfaff
Product Description
YEQIN Universal Cap/Hat Hoop, Embroidery Machine Cap Hoop for Brother Babylock Singer Bernina Janome Singer Husqvarna Viking Pfaff
Ready to Be Embroidered on in Seven Simple Steps Easy and convenient the baseball cap can be hooped and ready to be embroidered on in seven simple steps.
- Step 1 - Pull shiny backing off of adhesive stabilizer. Adhere to the bottom of the Cap Hoopster. Make sure the stabilizer is taught and firmly attached to the Cap Hoop, allowing it to wrap around the edges of the Cap Hoopster if necessary.
- Step 2 - Determine where design should go onto the cap. The use of a water-soluble pin will help center design. Just make sure a vertical and horizontal line intersecting at the center point of the design.
- Step 3 - Loosen visor clamp by turning thumbscrew. Attach clear template with two holes to the two small pegs on the visor clamp. Loosen back strap on cap and slide the visor under the template and visor clamp. Center the area of the cap that will be embroidered. The markings on the cap and the template will help you to do this.
- Step 4 - Make sure sweat band is pulled back before you tighten down on thumbscrew. a) You must prevent the sweatband from being stitched to the cap. Taping or pinning the sweat band may be necessary. b) Stand-up buckram (a non-fused backing) must be pulled back with sweatband. Cutting buckram liner an inch or two on each side, where it is stitched to the visor, will allow it to be pulled back neatly.
- Step 5 - Press the cap down against the adhesive backing starting in the middle and working out. The cap must be as flat and smooth as possible.
- Step 6 - Clamp the Cap Hoopster to the outer machine hoop on the side opposite where the machine hoop attaches to the embroidery unit.
- Step 7 - Turn your machine on and set it up for embroidery as usual. Turn embroidery unit on and attach attach machine hoop. You may have to remove the foot and/or shank to do this. Use curser keys to center needle and begin to embroider designs onto the cap.
Remember, design must be rotated clockw
Technical Specifications
You might also like

Brother PE800, 5x7 Embroidery Machine, One Size, White

World Weidner Tear Away Machine Embroidery Stabilizer Backing 100 Precut Sheets Medium Weight 1.8 Ounce 12"x10" Fits 5x7 Hoops

New brothread 40 Brother Colors Polyester Embroidery Machine Thread Kit 500M (550Y) Each Spool for Brother Babylock Janome Singer Pfaff Husqvarna Bernina Embroidery and Sewing Machines

Sew Tech Embroidery Hoops for Brother SE600 PE550D PE535 SE400 PE525 PE540D PE500 SE625 SE425 Innovis Babylock Brother Embroidery Machine Hoop (3in1 Set)

New brothread 30 New Colors Polyester Embroidery Machine Thread Kit 500M (550Y) Each Spool - Assortment 2

Tear Away Machine Embroidery Stabilizer Backing 100 Precut Sheets 8"x8" Medium Weight 1.8 Ounce Fits 4x4 Hoops
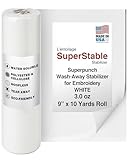
Wash-Away Water Soluble Stabilizer 9 inch x 10 Yard Roll. SuperStable Embroidery Stabilizer & Topping

New brothread 144pcs White 60S/2(90WT) Prewound Bobbin Thread Plastic Size A SA156 for Embroidery and Sewing Machine Polyester Thread Sewing Thread

Simthread 63 Brother Colors Polyester Embroidery Machine Thread Kit 40 Weight for Brother Babylock Janome Singer Pfaff Husqvarna Bernina Embroidery and Sewing Machines 550Y
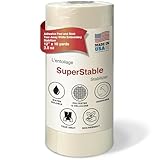
Adhesive Peel and Stick Tear Away Stabilizer White 2.0 oz 12 inch x 10 Yard Roll. SuperStable Embroidery Stabilizer Backing